Activity 3 - Foundations of Google Analytics 4 + Setup
3. Continue to: Activity 4 – Creating a Data Stream & Installing GA4
Follow the steps in the exact order below.
Each step builds on the previous one and skipping steps may result in no data being collected.
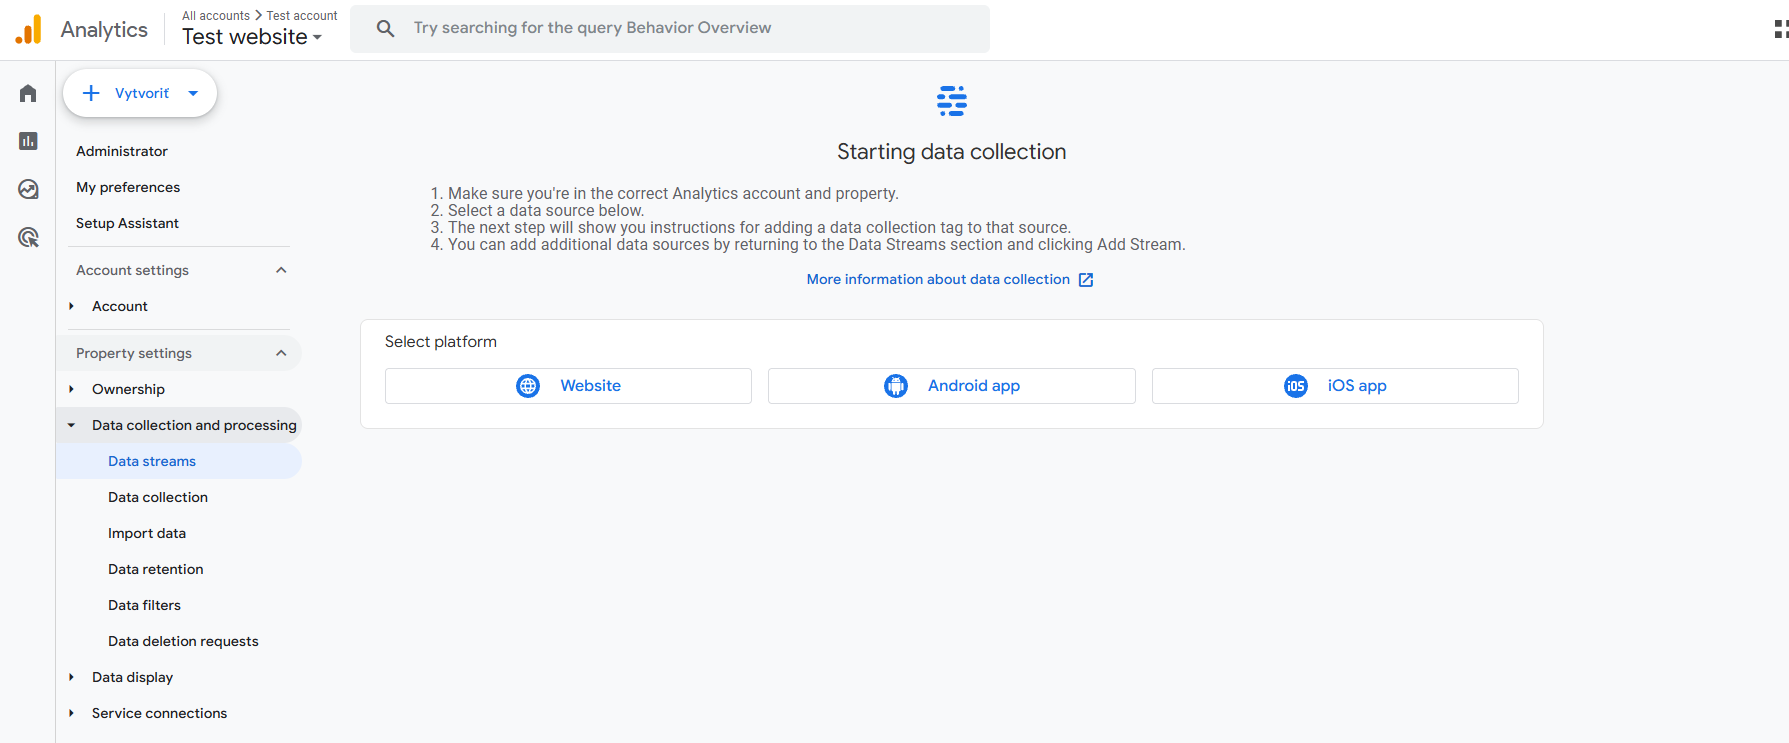
Step 1: Admin settings
-
In GA4, go to Admin → Data streams
-
Click Add stream
-
Select the platform:
-
Website
-
Android app
-
iOS app
-
👉 For this course, always select Website.
Step 2 – Setting Up a Web Data Stream
-
Enter your Website URL
-
Enter a clear Stream name (e.g.
E-shop – test site) - Click Create and continue

Step 2a – Enable Enhanced Measurement (Very Important)
-
Make sure Enhanced measurement is switched ON
-
Click the ⚙️ icon to review individual events

Enhanced measurement automatically tracks:
-
Page views
-
Scrolls
-
Outbound clicks
-
Site search
-
Form interactions
-
Video engagement
-
File downloads
Step 3 – Your Unique Measurement ID (Key Concept)
On the Web stream details screen, you will find:
-
Measurement ID (format:
G-XXXXXXXXXX) -
Stream URL
-
Stream name
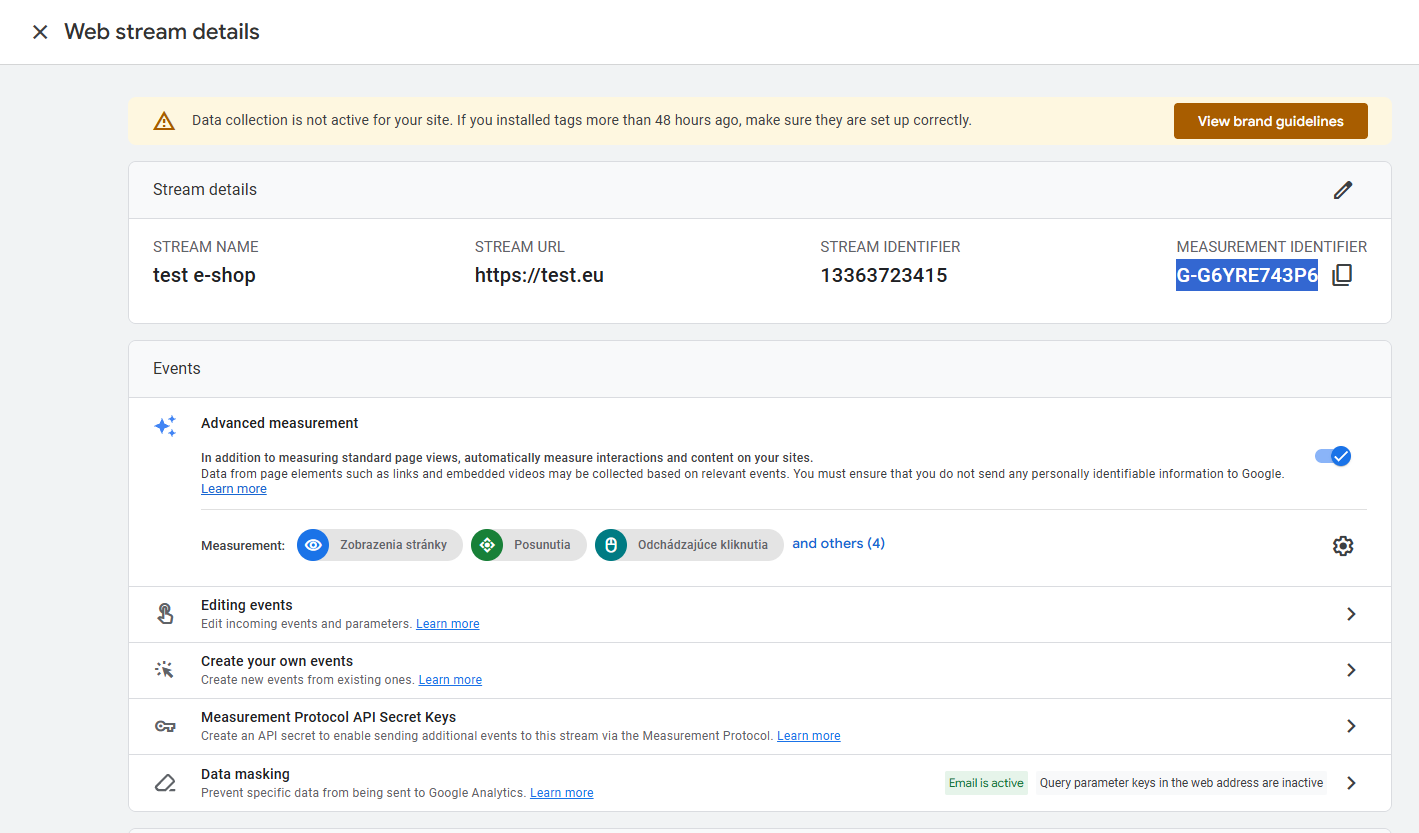
What the Measurement ID Is
The Measurement ID is:
-
a unique identifier for your GA4 data stream
-
the “address” where your website sends data
Step 3a – Understanding the GA4 Script Code
GA4 provides a gtag.js tracking script, for example:
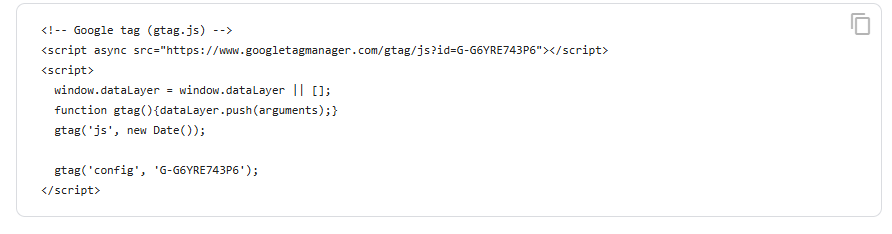
What This Code Does
-
Loads Google Analytics tracking library
-
Creates a data layer
-
Sends page view and event data to GA4
-
Connects data using your Measurement ID
Step 4 – Implementing GA4 on Different Platforms
GA4 can be implemented in different ways depending on the platform.
WordPress - Google Tag Manager plugin or GA4-specific plugin (e.g. Site Kit by Google)
Shopify - Use Shopify Google channel or insert GA4 via Google Tag Manager
Shoptet - GA4 Measurement ID can be added in Shoptet administration
Wix - GA4 can be connected via Marketing Integrations
Before considering this activity complete, you must verify that GA4 is actively collecting data. Open your website in a new browser tab and perform at least one action such as loading a page, clicking a link, or scrolling, then return to Google Analytics 4 and navigate to Reports → Real-time. If you see at least one active user and events appearing in real time, your implementation is working correctly; if not, check that the Measurement ID is correct, the tracking code is properly installed, analytics consent is enabled, and allow a few minutes for data to appear. Once real-time data is visible, your GA4 setup is successfully completed and the job is done—you are now ready to begin analyzing real user behavior.