Google Tag Manager - Introduction
Google Tag Manager (GTM) is a free tag management system (TMS) provided by Google that allows you to configure and deploy tracking snippets (known as "tags") on a website or mobile app from a single, centralized web-based user interface.

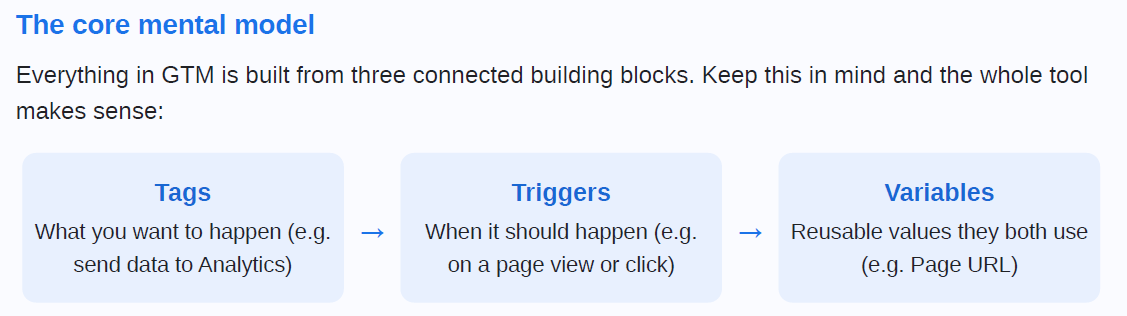
Implementing Google Tag Manager (GTM) involves a hierarchical setup of accounts and containers followed by the physical installation of code snippets on your digital property.
- Create an Account: Go to tagmanager.google.com, sign in, and select Create Account. An account typically represents an entire company or organization.
- Configure a Container: Within the account, create a container for each website or mobile app.
- Container Name: Use the top-level URL (e.g., www.example.com)
- Target Platform: Select the appropriate environment, such as Web (most common), iOS, Android, AMP, or Server
- Accept Terms: Agree to the Terms of Service to generate your unique container ID (formatted as
GTM-XXXXXXX)
<head> tag to ensure the container begins loading early.- Manual Code Injection: For custom sites, edit your base HTML templates directly. This is preferred for performance as it avoids plugin overhead

GTM-KT5XW6CS) installed, which serves as a central management system for tracking tags. Within this container, a Google tag (G-7V3TYX7PML) is configured to collect user interaction data, such as page views and events, and send it to its configured destination, which is the associated Google Analytics 4 (GA4) property. In this relationship, the GTM container manages when and how tags are triggered, the Google tag handles the transmission of data, and the GA4 property receives, processes, and stores the collected analytics data for reporting and analysis.To create a Google Tag Manager (GTM) account and container, follow these simple steps:
- Open Google Tag Manager and click Create Account.
- In the Account Setup section, enter an Account Name (usually your organization or company name), select your Country, and optionally choose whether to share data anonymously with Google.
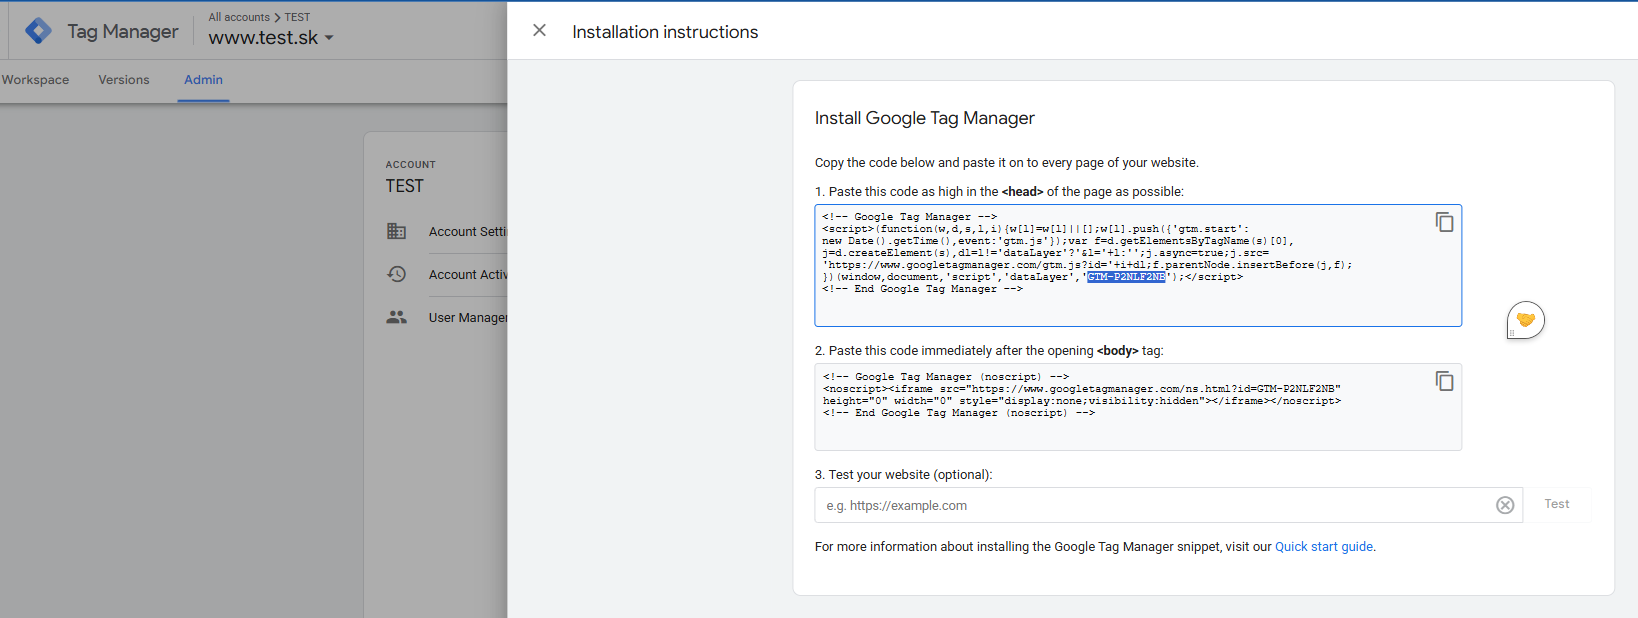
- In the Container Setup section, enter the Container Name, which is typically your website's domain (e.g.,
www.test.sk). - Select the Target Platform. For a website, choose Web (other options include iOS, Android, AMP, and Server for different platforms).
- Click Create to generate the GTM account and container.
- Read and accept the Google Tag Manager Terms of Service by clicking Yes.
- After the container is created, GTM provides two JavaScript code snippets. Copy these snippets and install them in your website's HTML - One in the
<head>section and the other immediately after the opening<body>tag. Once installed, your GTM container is ready for adding and managing tracking tags such as Google Analytics 4.

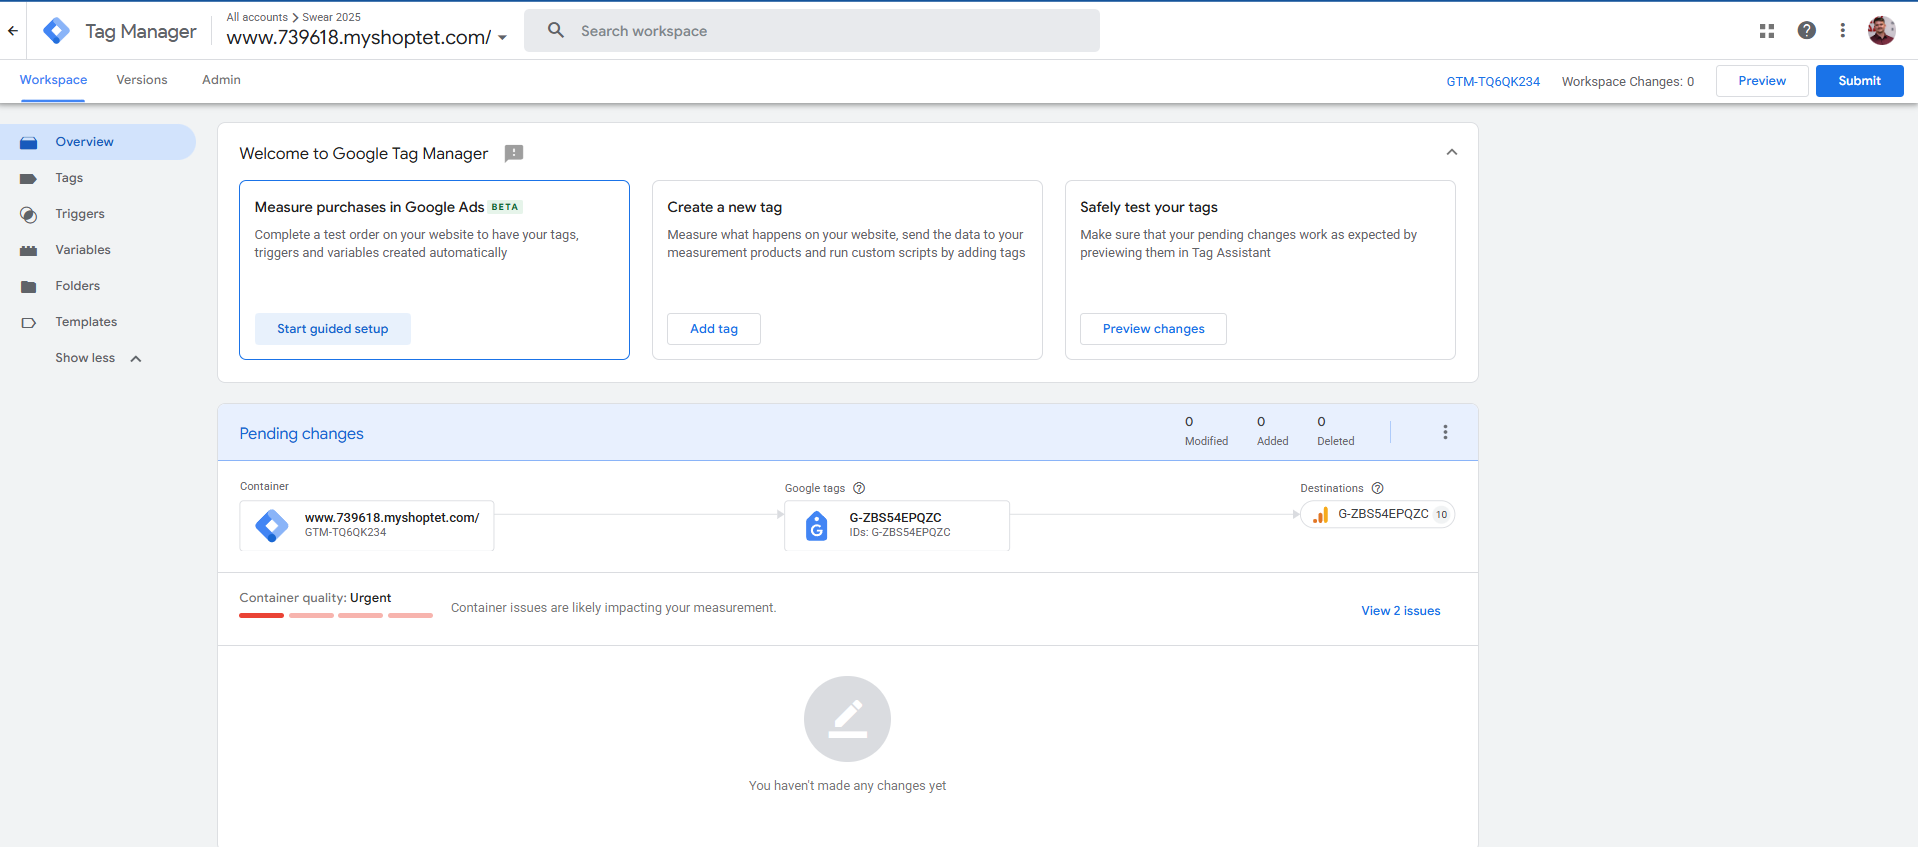
Left sidebar - Main section
Google Ads.
ID, or a measurement ID.
A typical first workload
1. Open the correct container from the top-bar selector.
2. Go to Variables and enable the built-in variables you need.
3. Create a Tag (e.g. a Google Analytics 4 tag).
4. Attach a Trigger so the tag knows when to fire.
5. Click Preview and test that everything works.
6. Click Submit to publish a new live version.
Tags, Triggers, Variables
Tags are executable snippets of JavaScript code provided by analytics, marketing, and support vendors to capture user interactions.
Purpose: They act as messengers that send data from your website to a third-party system, such as Google Analytics 4, Google Ads, or Meta Pixel.ň
Types: GTM provides pre-built templates for common services (like Google Analytics) or allows you to create Custom HTML tags for unique tracking requirements
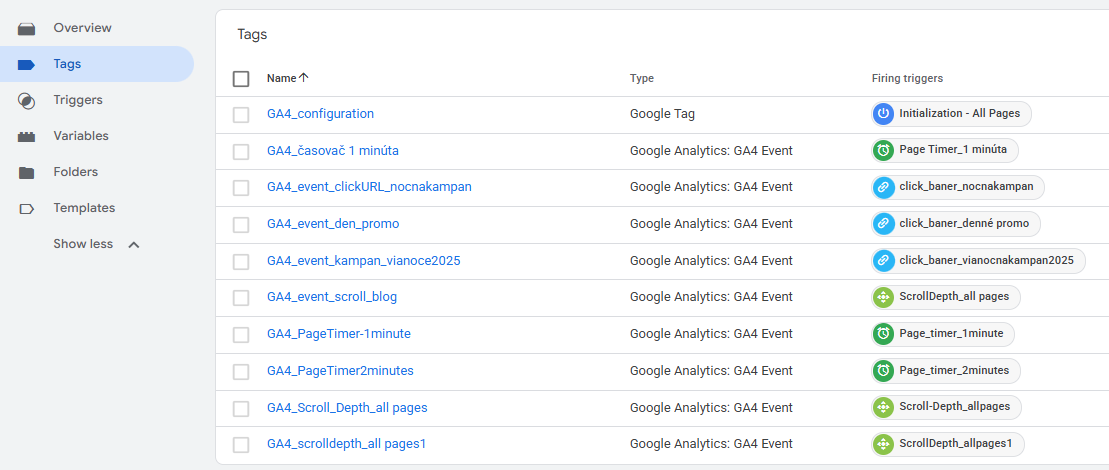
Triggers are conditions that monitor the application environment and determine exactly when a tag should execute, or "fire".
Purpose: They ensure that tags only run during specific user interactions or system events, such as page views, button clicks, form submissions, or page scrolls.
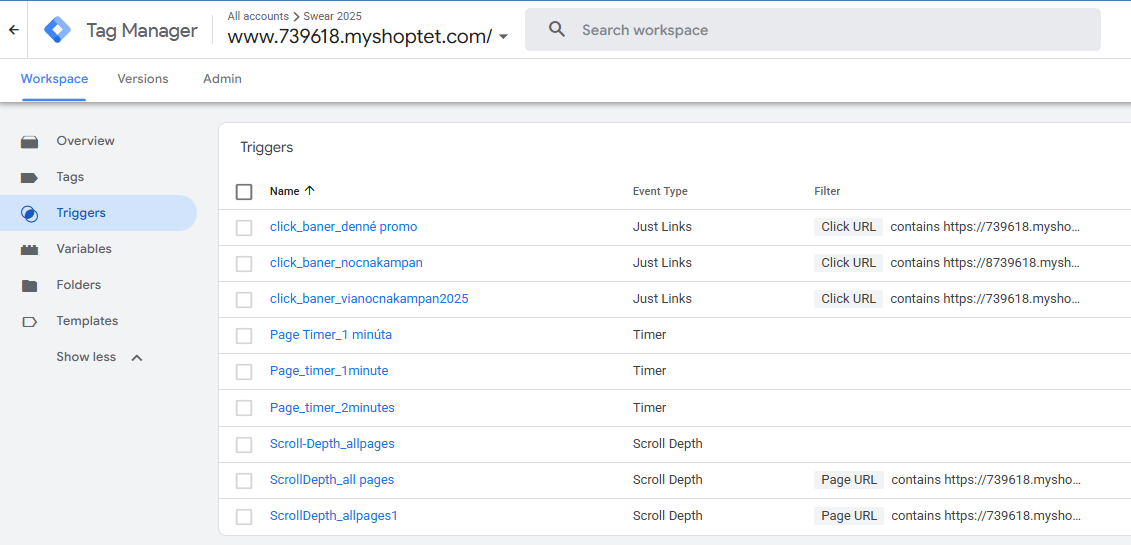
Variables are named placeholders for values that change, serving as data inputs for both tags and triggers.
Purpose: They store information about the website page or user actions that GTM uses to make decisions (in triggers) or pass as data (in tags).
Categories:
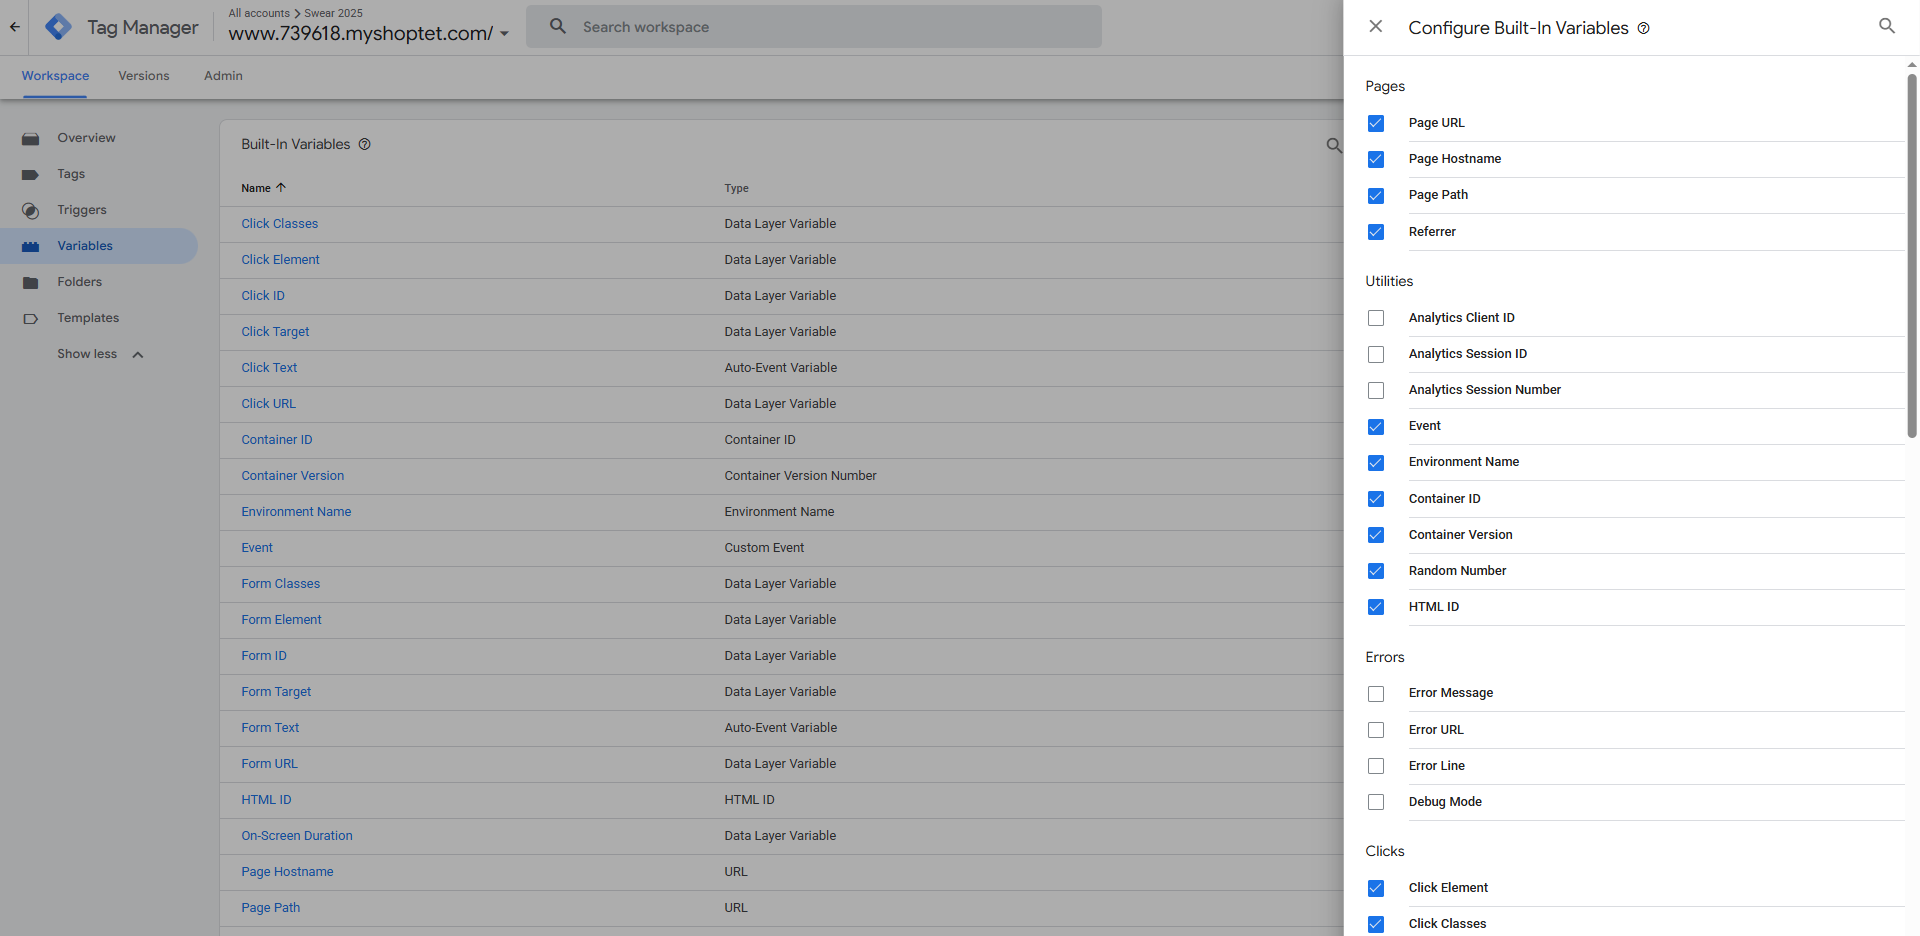
- Built-in Variables: Out-of-the-box placeholders for standard browser context, such as Page URL, Referrer, Click Classes, and Form ID
- User-Defined Variables: Custom configurations created by the user to fetch data from specific sources like First-Party Cookies, JavaScript variables, or the Data Layer
Example 1 — Track clicks on a specific button
Say you want to know when people click a "Sign up" button.
Variables — enable Click built-ins
- Go to Variables → Built-In Variables → Configure.
- Tick
Click Element,Click Classes,Click ID, andClick Text.
These now automatically capture information about whatever was clicked.
Trigger — the button click
- Go to Triggers → New → Click → All Elements (use "Just Links" instead if the button is a real link).
- Set it to fire on Some Clicks.
- Add a condition, for example:
Click IDequalssignup-btn
(orClick TextcontainsSign up). - Name it
Click - Sign Up Buttonand save.
Tag — send the event to GA4
- Go to Tags → New → Google Analytics: GA4 Event.
- Set the Configuration/Measurement ID to
{{GA4 - Measurement ID}}(reusing the variable from Example 1). - Event Name:
sign_up_click. - Optionally add an event parameter, e.g. parameter
button_textwith value{{Click Text}}. - Under Triggering, attach
Click - Sign Up Button. - Save.
Every GTM setup follows the same pattern: a Variable holds a value, a Trigger decides the moment, and a Tag performs the action